
Twinkie Mummies: Easy Halloween Treats
I’m really excited to share a fun Halloween treat with you—Twinkie Mummies! As you know, I’m a big fan of easy recipes, so this no-bake option is ideal for me. Starting with store-bought Twinkies means no baking, no mess, and perfectly sized mummies every time.
You can make them in any color, and they look so cute, wrapped up for favors, or arranged on a platter. They won’t last long.
When my kids were little, making Halloween treats together was one of our favorite traditions. We’d cover the kitchen table in wax paper, break out the candy eyes, and laugh at our wonky little creations.
Now that I have a granddaughter, I’m already looking forward to carrying on the fun with her. Recipes like these Twinkie Mummies are perfect because they’re simple, stress-free, and just the right size for little hands.
Ingredients For Twinkie Mummies

- 10 Twinkies – These sponge cake treats make the perfect base.
- 1 bag light cocoa and orange candy melts – Used for coating the Twinkies in a smooth chocolate layer
- 1 bag white candy melts – These are used to create the mummy’s “bandages” with a fun drizzle effect.
- 20 candy eyeballs – Two for each mummy!
- 10 paper straws – Inserted into each Twinkie to turn them into easy-to-hold mummy pops.
How to Make Halloween Twinkie Mummies
Start by unwrapping all the Twinkies. Gently insert a paper straw into each one—just far enough to hold, but not all the way through. Then, place them on a baking sheet lined with wax paper.
Pop the tray into the freezer for about 10 minutes. This helps firm the Twinkies up so they’re easier to dip and decorate without falling apart.
While the Twinkies are chilling, melt the candy according to the directions on the bag. Use a separate bowl for each color.
Remove the Twinkies from the freezer and place a wire rack over wax paper to catch any drips. Dip one Twinkie at a time into the melted candy. Use a spoon to help coat the whole cake with candy. Use the back of the spoon to smooth out the coating.
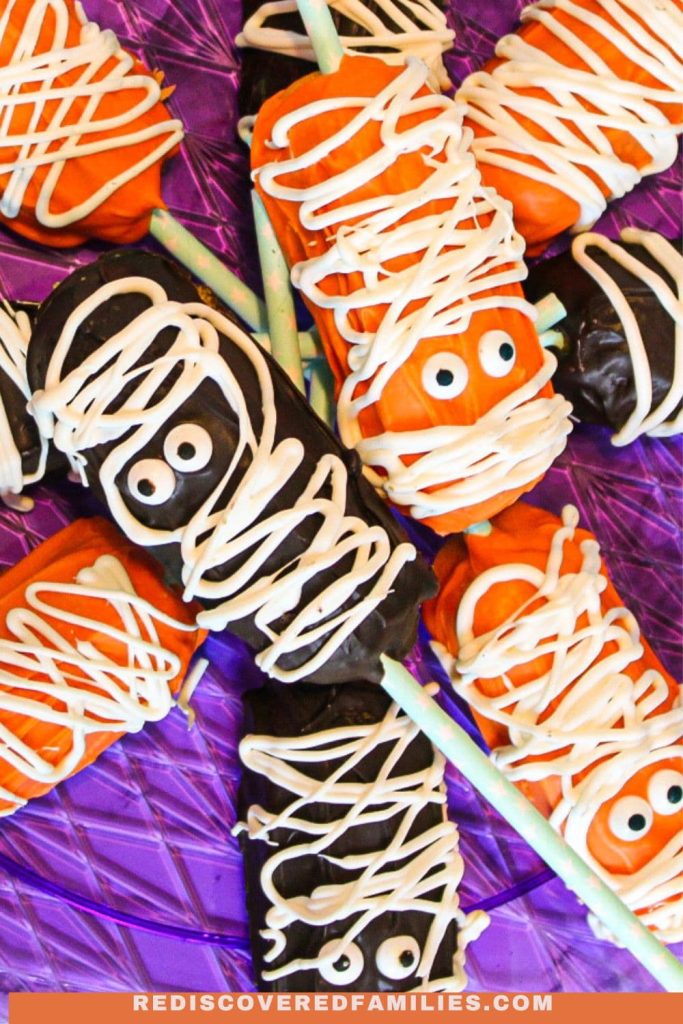
Dip half the Twinkies into the chocolate and the other half into the orange. While the coating is still soft, press two candy eyeballs onto the front of each mummy.
Let the coated Twinkie rest on the rack for a minute, allowing any excess candy to drip off. Then, transfer it back to the wax paper to set.
Next, melt the white candy melts and spoon it into a piping bag or a plastic bag with a tiny hole snipped in one corner. Drizzle the white chocolate back and forth over each Twinkie to create the mummy’s wraps.
Let the mummies sit until the candy coating is completely firm. Now, they’re ready to serve or share. Of course, the cook is entitled to sneak one from the tray when no one’s looking!
This treat is part of my Halloween and Fall Recipe collection. You can find all my Holiday & Seasonal Recipes here, or head to the Kid-Friendly Recipes resource hub for everything in one place.
Tips For Making Twinkie Mummies
- Freezing your Twinkies before dipping helps them stay firm and keeps the coating smooth and even.
- If your candy melts are too thick, stir in a little coconut oil or shortening to thin them out and give a nice glossy finish.
- Using a piping bag makes it easy to drizzle neat “bandages” without a mess.
- If you don’t have a piping bag, use a plastic bag with a corner cut-off.
Variations To Try
- Use green or purple candy melts instead of white for a fun twist—perfect for monsters or Frankenstein mummies.
- Skip the straw and cut the Twinkies into smaller pieces to make bite-size mummy pops.
Halloween Twinkie Mummies
Ingredients
- 10 twinkies
- 1 bag light cocoa candy melts
- 1 bag orange candy melts
- 1 bag bright white candy melts
- 20 Candy eyeballs
- 10 paper straws
Instructions
- Unwrap the Twinkies and get them ready for their spooky makeover.
- Gently poke a paper straw into each one—don’t go all the way through!
- Pop the Twinkies into the freezer for 10 minutes. It helps them hold their shape.
- Melt your candy according to the package. Use a different bowl for each color.
- Dip each Twinkie into the melted candy. Use a spoon to coat and smooth it all over.
- Let the excess drip off on a wire rack, then move them to wax paper to set.
- While the coating is still soft, add two candy eyes to each mummy.
- Melt the white candy melts and drizzle across the Twinkies to make “bandages.”
- Let them sit until everything is firm and set.
- Serve, share, and enjoy!
Notes
- Freezing your Twinkies before dipping helps them stay firm and keeps the coating smooth and even.
- If your candy melts are too thick, stir in a little coconut oil or shortening to thin them out and give a nice glossy finish.
- Using a piping bag makes it easy to drizzle neat “bandages” without a mess.
- If you don’t have a piping bag, use a plastic bag with a corner cut off
These Twinkie Mummies are a fun, no-bake Halloween treat that’s easy to make and even more fun to eat. Print the recipe and give them a try—they’re perfect for parties, school snacks, or just a little spooky fun at home. Don’t forget to save a pin so you can come back to the recipe anytime!